Octopus:bit
Inside your Peripherals Kit you have a micro:bit connection device called the octopus:bit.
The octopus:bit allows you to attach peripherals to a micro:bit’s input / output pins using color-coded positions.
Connect to a Micro:bit
The micro:bit gets inserted into the octopus:bit as shown here:
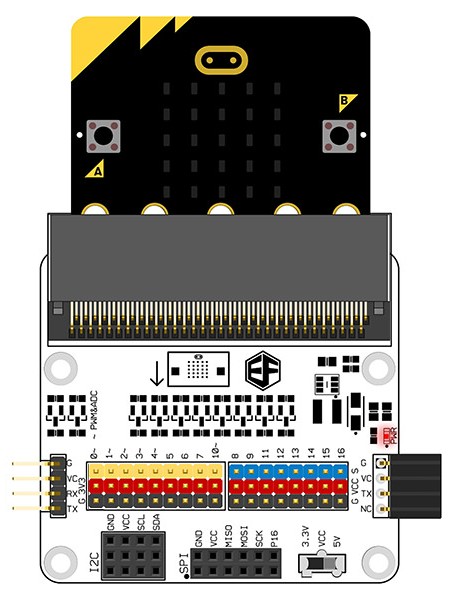
The micro:bit buttons should be facing toward you when looking at the front of the octopus:bit.
The red PWR LED, on the right-hand side of the octopus:bit, will light up when the micro:bit is inserted correctly.
Connect Peripherals
The octopus:bit makes connecting peripherals easy!
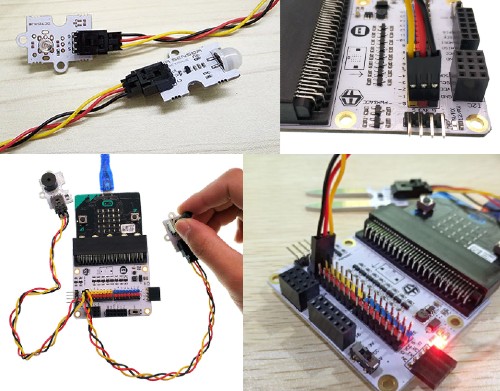
There are a few things to know:
The colors on the cables matter.
Black is G (Ground) and needs to be connected to a black pin
Red is VCC (Power) and needs to be connected to a red pin
Yellow is S (Signal) and can be connected to a yellow or blue pin
The two ends of the cable are different
The larger end is inserted in the peripheral and should lock into place
The smaller end attaches to the octopus:bit
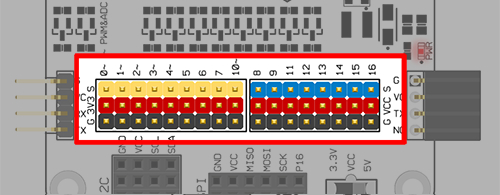
Input / Output Pin Diagram
This diagram shows the micro:bit functions and capabilities of each of the octopus:bit pins.

- NOTES:
The green ~ symbol means the position can be used as an analog input.
P0, P1, and P2 have no shared micro:bit functions.
All positions can be used as digital inputs / outputs.
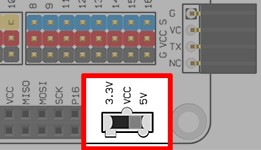
Output Voltage Switch
The octopus:bit has a VCC Switch that allows you to switch the BLUE connector positions between 3.3 Volt and 5 Volt operation.